지난 몇 년 동안 TikTok, Instagram Reels 또는 YouTube Shorts를 스크롤했다면 이미 CapCut의 작품을 보셨을 것입니다. 부드러운 슬로우모션 전환이요? 아마도 캡컷일 겁니다. 완벽하게 동기화된 자동 캡션이요? 다시 캡컷. 앱이 "오, 그 무료 편집기요?"에서 바뀌었습니다. 전문 콘텐츠 제작자가 진정으로 의존하는 도구입니다.
캡컷 는 ByteDance(예, TikTok을 개발한 팀)에서 개발한 무료 올인원 비디오 편집 애플리케이션입니다. 2020년에 출시된 이 작품은 솔직히 편집계를 놀라게 했습니다. CapCut 이전에는 Premiere Pro 비용을 지불했거나 DaVinci Resolve의 학습 곡선과 씨름했거나 모든 것에 워터마크를 추가하는 기본 모바일 편집기에 만족했습니다. CapCut은 해당 방정식을 완전히 변경했습니다.
무엇이 특별할까요? 세개. 첫째, 그것은 진짜 무료 — 내보내기 시 워터마크가 없고 페이월 기본 기능이 없습니다. 둘째, 그것은 어디에나: 휴대폰(iOS 및 Android), 데스크톱(Windows 및 Mac) 및 브라우저. 셋째, 포장한다 AI 도구 배경 제거, 자동 캡션, 자연스러운 음성으로 텍스트 음성 변환, AI 비디오 생성 등 불과 몇 년 전만 해도 수백 달러의 비용이 들었을 것입니다.
💡
경험에서 얻은 전문가 팁: 방금 시작한 경우 모바일 앱으로 시작하여 기본 사항을 익힌 다음 심각한 프로젝트를 위해 데스크톱 버전으로 전환하세요. 인터페이스 로직이 동일하기 때문에 전환이 자연스럽게 느껴집니다. 데스크톱의 화면 공간과 성능이 더 높을 뿐이죠.
이 가이드의 대상(및 여기에서 찾을 수 있는 내용)
이 사이트는 "CapCut에서 X를 수행하는 방법"을 검색하고 이미 버전 5에 있을 때 버전 2.0을 설명하는 오래된 기사를 찾는 것에 지쳤기 때문에 존재합니다. 또는 더 나쁜 것은 분명히 앱을 열지 않은 "상위 10개 비디오 편집자" 목록입니다.
모든 가이드는 실제 경험을 바탕으로 작성되었습니다. 어떤 기능이 특정 방식으로 작동한다고 말한다면 그것은 제가 직접 테스트했기 때문입니다. 대개 실제 프로젝트를 미루다가 말이죠.
플랫폼 전반에 걸친 CapCut: 모바일, 데스크탑, 웹
CapCut의 가장 큰 장점 중 하나는 플랫폼 유연성. 당신은 하나의 장치에 갇혀 있지 않습니다. 출퇴근 중에 휴대폰에서 비디오 편집을 시작하고, 집에서 PC에서 다듬고, 직장에서 웹 편집기에서 공유하세요. 모든 것이 귀하의 계정을 통해 동기화됩니다.
CapCut 모바일 앱(iOS 및 Android)
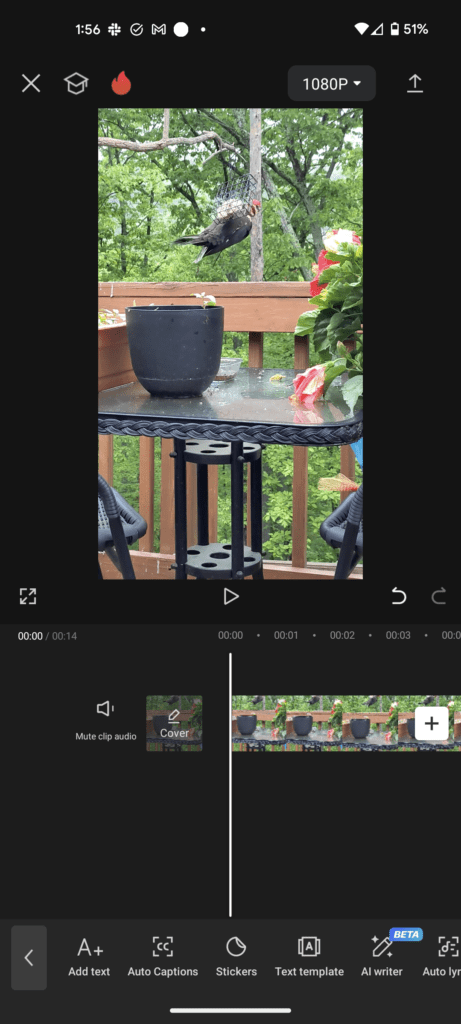
모바일 앱은 대부분의 사람들이 CapCut을 발견하는 곳입니다. 그리고 솔직히? 전화 앱치고는 엄청나게 강력합니다. 다층 타임라인 편집, 키프레임 애니메이션, 크로마 키, 속도 곡선 등 데스크톱 편집자들이 불과 5년 전에만 비용을 청구했던 기능을 이용할 수 있습니다.
모바일 앱이 빛을 발합니다 빠른 편집. 클립을 촬영하고 인기 있는 오디오와 몇 가지 전환, 자동 캡션을 추가하고 15분 안에 게시하려고 합니다. 이것이 바로 CapCut 모바일의 장점입니다. 원탭 템플릿은 실제로 유용하며(대부분의 앱처럼 눈에 띄지 않음) TikTok 및 Instagram으로 직접 내보내면 놀라운 시간이 절약됩니다.
단점에 대해서도 솔직하게 말씀드리겠습니다. 모바일에서 더 긴 프로젝트(5분 이상)를 작업하는 것은 답답하게 느껴질 수 있습니다. 타임라인은 점점 복잡해지고, 작은 화면에서 오디오 레벨을 미세 조정하는 것은... 인내심을 요하는 일입니다. 이때 데스크톱 버전이 필요합니다.
CapCut 데스크탑(Windows 및 Mac)
데스크톱 앱은 CapCut이 "모바일 편집자"가 되는 것을 멈추고 합법적인 생산 도구. 멀티 트랙 타임라인, 곡선과 휠을 사용한 적절한 색상 그레이딩, 베지어 곡선을 사용한 속도 증가, 거의 모든 속성에 대한 키프레임 애니메이션, 효과 및 전환이 포함된 대규모 라이브러리.
CapCut Desktop을 처음 열었을 때 가장 놀랐던 점은 AI 제품군. 실제로 단어를 올바르게 표현하는 자동 캡션입니다(악센트가 있어도!). 사진뿐만 아니라 비디오에서도 원클릭 배경 제거가 가능합니다. 스마트 HDR. AI가 생성한 B롤 제안. 후배 편집자가 도와주는 것 같은 느낌이에요.
프리미어 프로 대체품인가요? 콘텐츠 제작자의 90%는 예. 방송 수준의 컬러 그레이딩이나 복잡한 멀티캠 워크플로우에는 아직 적합하지 않습니다. 하지만 YouTube 동영상, 소셜 콘텐츠, 중소기업을 위한 클라이언트 작업, 강좌 생성 등의 경우 CapCut Desktop이 모든 것을 처리하고 잘 처리합니다.
CapCut의 데스크탑 타임라인 편집기는 멀티트랙 편집 기능을 제공합니다
CapCut 웹 편집기
그만큼 웹 편집기 과소평가된 보석이다. 다운로드도, 설치도, "내 컴퓨터가 충분히 강력한가요?"도 없습니다. 불안. 브라우저를 열고 로그인한 후 편집하세요. CapCut 서버에서 무거운 작업이 발생하기 때문에 구형 시스템에서도 놀랍도록 원활하게 실행됩니다.
나는 빌린 노트북에서 빠르게 편집해야 하는 상황이나 메인 컴퓨터가 다른 것을 렌더링하고 있을 때 이 기능을 사용했습니다. 데스크톱 앱만큼 기능이 완벽하지는 않지만 트리밍, 텍스트 추가, 효과 적용 및 내보내기 작업이 빠르게 완료됩니다.
CapCut을 돋보이게 만드는 주요 기능
🎬
AI 자동 캡션
20개 이상의 언어로 정확한 자막을 자동으로 생성합니다. CapCut의 음성 인식 기능은 전용 전사 서비스에 필적하며 편집기에 바로 내장되어 있습니다.
✏️
배경 제거
한 번의 클릭으로 비디오와 사진의 배경을 제거할 수 있습니다. 녹색 화면이 필요하지 않습니다. 머리카락과 복잡한 가장자리에서도 AI 가장자리 감지 기능이 놀라울 정도로 향상되었습니다.
🎨
템플릿 라이브러리
매주 업데이트되는 수천 개의 인기 템플릿. 클립을 넣으면 CapCut이 전환, 음악 동기화 및 효과를 처리합니다. 릴과 TikToks에 적합합니다.
⚡
속도 곡선
기본적인 속도 증가/감속을 뛰어넘으세요. CapCut의 베지어 속도 곡선을 사용하면 시청자가 잠시 멈추고 다시 시청하게 만드는 효과인 영화 같은 속도 램프를 만들 수 있습니다.
🎤
텍스트 음성 변환
텍스트를 자연스러운 음성 해설로 바꿔보세요. 다양한 음성 스타일, 조정 가능한 속도, 놀랍도록 인간적인 억양. 설명 동영상 및 스토리텔링에 적합합니다.
🔮
AI 비디오 생성기
원하는 것을 설명하면 CapCut의 AI가 처음부터 비디오 콘텐츠를 만듭니다. 계속 발전하고 있지만 이미 B롤, 인트로 및 창의적인 실험에 유용합니다.
5분 만에 CapCut 시작하기
소개에 절반의 시간을 소비하는 30분짜리 "초보자 튜토리얼"은 잊어버리세요. 실제 빠른 시작은 다음과 같습니다.
1
다운로드 및 가입
귀하의 플랫폼에 맞는 앱을 선택하세요. 계정 만들기 (이메일 또는 소셜 로그인 — 30초 소요)
2
영상 가져오기
"새 프로젝트"를 탭한 다음 클립을 추가하세요. CapCut은 화면비를 자동 감지합니다. Reels/TikTok의 경우 9:16, YouTube의 경우 16:9입니다.
3
편집 및 향상
전환을 다듬고, 분할하고, 추가합니다. 자동 캡션을 사용해 보고, 인기 템플릿을 추가하고, 색상을 조정하세요. 자유롭게 플레이해 보세요. 언제든지 실행 취소할 수 있습니다.
4
내보내기 및 공유
내보내기를 누르세요. 해상도(최대 4K)를 선택하세요. 워터마크가 없습니다. TikTok, Instagram에 직접 공유하거나 장치에 다운로드하세요.
🚀
속도 해킹: Reels 또는 TikToks를 편집하는 경우 빈 캔버스를 건너뛰고 템플릿으로 시작하세요. 자신의 스타일에 가까운 클립을 찾아 클립을 교체하고 텍스트를 수정한 후 내보냅니다. 이런 식으로 3분 안에 동영상을 게시했습니다.
CapCut과 다른 편집자: 정직한 비교
저는 많은 에디터를 사용해왔습니다. CapCut이 진정으로 승리하는 부분과 그렇지 않은 부분이 여기에 있습니다.
특징
캡컷(무료)
Premiere Pro
DaVinci Resolve
iMovie
Price
Free
$22.99/mo
Free / $295
Free (Mac only)
AI 자동 캡션
✔ Built-in
✔ Recent
❌ Plugin needed
❌
배경 제거
✔ One-click AI
✔ Manual/Roto
✔ Manual
❌
템플릿
✔ Thousands
Limited
❌
Basic
Mobile App
✔ Full-featured
✔ Premiere Rush
✔ iPad only
✔ iOS
Learning Curve
Low
High
Medium-High
Very Low
보내기 워터마크
None
None
None
None
Pro 컬러 그레이딩
Good
Excellent
Industry best
Basic
The takeaway? CapCut wins on accessibility and AI features. It's the editor that gives you 80% of what Premiere Pro offers at 0% of the cost. If you need broadcast-level 컬러 그레이딩, DaVinci Resolve is still king. But for social media content, YouTube videos, and everyday editing, CapCut is genuinely hard to beat.
The Power of CapCut 템플릿
I used to be a "템플릿 are for beginners" snob. Then I watched a friend pump out five Reels in the time it took me to finish one — all using 템플릿, all getting more engagement than my "hand-crafted" edits. Lesson learned.
CapCut's 템플릿 system is different from most editors. These aren't just static presets — they're fully structured video projects with synchronized transitions, music, text animations, and effects. You pick a 템플릿, drop in your clips, and the 템플릿 handles the timing and flow.
그만큼 Reels and TikTok 템플릿 are especially popular. They track trends in real-time, so when a new transition style or audio goes viral, you'll find matching 템플릿 within days. The iCal 템플릿 trend is a perfect example — it exploded on social media, and CapCut had optimized 템플릿 ready almost immediately.
CapCut's AI Features: The Real Game-Changer
Let's talk about the elephant in the room: AI in 영상 편집. A lot of editors are slapping "AI" labels on basic automation. CapCut is one of the few that delivers genuinely useful AI tools.
그만큼 AI 클립 메이커 deserves special mention. You feed it a long video — say, a 30-minute podcast or livestream — and it automatically identifies the most engaging moments and cuts them into short-form clips. The quality isn't perfect (sometimes it cuts mid-sentence), but it gives you a solid starting point that saves hours of manual clipping.
Auto-자막 are probably the most used AI feature. They support 20+ languages, and the accuracy is impressive. I'd say it gets 95% of words right in clear audio conditions. For accented speech or noisy environments, you'll need to make corrections, but it's still 10x faster than typing 자막 manually.
Text-to-speech has gotten eerily natural. The latest voice models don't sound robotic — they have intonation, pacing, and even emotional variation. If you're making explainer content or faceless channels, this feature alone is worth exploring.
CapCut's AI tools transform how creators approach 영상 편집
Is CapCut Pro Worth It?
The free version is impressive. But 캡컷 프로 adds some genuinely useful stuff:
Premium 템플릿 and effects — The Pro-only 템플릿 tend to be higher quality and more unique
Cloud storage (100GB) — Sync projects across devices without external storage headaches
Priority 보내기 — Faster rendering times, which matters when you're on a deadline
Advanced AI features — More AI credits, longer video generation, and priority access to new AI tools
Premium fonts and music — Commercially licensed, so no copyright strikes
Is it worth it? If you post content regularly (3+ times per week) and use 템플릿 and AI features heavily, yes. The time savings alone justify the cost. If you're a casual editor making the occasional video, the free version is genuinely more than enough.
7 Tips I Wish Someone Told Me When I Started Using CapCut
Learn keyboard shortcuts on desktop. Seriously. Split: Ctrl+B. Undo: Ctrl+Z. Zoom 타임라인: Ctrl+Scroll. These three alone will cut your editing time in half.
Use adjustment layers for 컬러 그레이딩. Instead of color correcting each clip individually, add an adjustment layer above all clips. One grade, applied everywhere. Change it once, it updates everything.
Auto-자막 first, then refine. Don't type 자막 manually. Let AI generate them, then scan through and fix the 5% it gets wrong. Way faster.
Save custom presets. Found a color grade you love? A text animation you use often? Save it as a preset. Future-you will be grateful.
보내기 at the right resolution. Not everything needs 4K. For TikTok and Reels, 1080p at 30fps is the sweet spot. Smaller file, faster upload, no visible quality difference on phone screens.
Use the "speed curve" for cinematic feel. Instead of abrupt speed changes, use the curve editor to create smooth speed ramps. It's the difference between "amateur" and "this looks expensive."
Explore the audio library before using copyrighted music. CapCut's built-in music library is actually good, and it's all copyright-safe. Using trending CapCut audio can even help with algorithm reach on TikTok.
🌟
Bonus tip: When exporting for Instagram Reels, turn OFF "Smart HDR" in 보내기 settings. Instagram compresses HDR content aggressively, and it can look washed out. Standard dynamic range looks better on that platform.
Ready to Create Something Amazing?
Join millions of creators who've already discovered why CapCut is the fastest-growing 영상 편집 앱 in the world.
Quick answers to the questions we hear most often about CapCut.
Yes, and this is what surprises most people. CapCut's free plan includes full 영상 편집 capabilities, AI auto-자막, 배경 제거, 템플릿, effects, transitions, and 워터마크-free exports up to 4K resolution. CapCut Pro adds premium 템플릿, more cloud storage, priority rendering, and extra AI credits — but the free version is genuinely powerful enough for most creators.
CapCut is available on iOS (iPhone and iPad), Android (Google Play Store and direct APK), Windows PC, Mac, and as a web-based editor in your browser. Projects sync across platforms through your CapCut account, so you can start on mobile and finish on desktop.
Absolutely. The desktop version supports multi-track 타임라인 editing, keyframe animations, 컬러 그레이딩, 스피드 커브, and advanced AI tools. Many professional content creators, social media managers, and small businesses use CapCut as their primary editor. For broadcast-level work or complex VFX, you might still need specialized software, but for 90% of content creation — CapCut handles it.
No. Unlike many free editors, CapCut does not add any 워터마크 to your exported videos — not on the free plan, not on any platform. Some CapCut 템플릿 may include a CapCut ending clip, but you can simply delete it from the 타임라인 before exporting.
CapCut wins on price (free vs $22.99/month), AI features (built-in auto-자막, 배경 제거, 텍스트 음성 변환), 템플릿, and ease of use. Premiere Pro excels in advanced color science, complex audio workflows, multi-cam editing, and integration with other Adobe apps. For social media content creation, CapCut is arguably the better choice. For professional broadcast or film work, Premiere Pro still has the edge.